How to Get Cat Urine Out of Hardwood Without Cupping the Boards
Short soaks with a full dry between them, never one long wet treatment. Whether that works at all is decided by the finish: put three drops of water on a clean board and read them at ten minutes. If they sit proud, the deposit is on top and a damp cloth reaches it; if they soak in and darken the wood, the urine went the same way and the boards come up or the smell stays.
The chemistry is the same as carpet. The physics is not, because wood swells and carpet does not.
What to Do About Cat Urine on a Hardwood Floor
Find out whether the finish held before you clean anything. Put 3 drops of water on a clean board and read it at 10 minutes. If the drops sit proud and wipe off dry, the deposit is on top and a damp cloth reaches it. If they soak in and darken the wood, the urine went the same way.
The test works because water and urine travel the same road. The finish is the only barrier the floor has, and the drops tell you whether that barrier is still standing. Ten minutes is long enough for intact polyurethane to shrug the water off and for bare wood to drink it.
On an intact finish, wipe rather than soak, dry within seconds, and repeat the short application several times over a day. You are trading dwell for repetition because you cannot have both.
Repetition is the compromise that keeps the floor alive. Each damp pass puts working liquid against the deposit for a minute or two, and each dry pass stops the wood from taking on moisture. Short contacts spread across a day deliver real total working time, in a shape the boards can survive.
No manufacturer document we read publishes a dwell time for a finished wood floor. The four to 24 hour figure on the shelf is written for carpet.
That gap is the honest center of the page. What follows is built from the physics of the floor and from what the documents do say, and every borrowed carpet figure stays out.
| Dwell | Not established. |
|---|---|
| What the bottle's dwell is for | Carpet. |
| Method | Short damp applications, dried between, repeated. Never a pour and never a covered soak |
| The decision that comes first | Is the finish intact, or did the urine get past it. |
| Finish test | 3 drops of water on a clean board, read at 10 minutes |
| Standing liquid | The failure mode, not the technique. Wood swells, cups and delaminates |
| Seams and gaps | The route to the subfloor. |
| Black staining | A tannin reaction below the finish. That is a sanding decision, not a cleaning one |
Why the Carpet Method Damages a Wood Floor
The two things that make the carpet method work are the two things that ruin wood.
The conflict is structural rather than a matter of care. An enzyme or bacterial product needs liquid and time against the deposit. Wood cannot safely give either one in carpet quantities, because its seams are open and its grain moves with moisture. The floor sets the budget the chemistry has to live within.
- Volume:
- On carpet you pour until the pad is wet. On wood, standing liquid runs into every seam and under the boards, where it cannot dry.
- Kept-wet dwell:
- On carpet you cover the spot with plastic for hours. On wood, holding moisture against a finish is how you get cupping and a lifted edge.
- Drying:
- Carpet dries through and returns to normal. Wood absorbs water, swells across the grain, and does not go back cleanly.
Bridgepoint's own urine directions, written for carpet, carry a parenthesis: "some subfloors may be susceptible to water damage."
This is also why the carpet instruction never gets softened into apply generously on this surface. Generous means a pour, a pour runs the seams, and the seams are the one part of this floor that cannot defend itself.
Cupping is the visible end of a chain that starts the moment liquid stands on the boards. A board takes on water through the face and the seams while its underside stays dry, and the two sides swell by different amounts. The board curls toward its dry face, the edges rise, and the finish cracks along the peak. None of that walks itself back.
How to Tell Whether the Urine Got Under the Finish
Three reads, in order, and the first one decides most floors.
The clean board is the control and the mark is the experiment. An old floor can absorb water slowly everywhere and a fresh finish can still hide one failed patch, and comparing the two boards is what separates the floor's age from the accident. Ten minutes on both readings puts them on the same clock.
Run them in this order because each read is cheaper than the one after it, and the first one can end the project. Beads that hold on clean wood and on the mark alike leave you a cleaning problem. Anything darker than a haze moves the floor toward sanding.
- The water bead test:
- Put 3 drops of water on a clean board 6 inches from the mark, and 3 more on the mark itself. Read both at 10 minutes. Beads that sit proud in both places mean the finish is intact.
- The color read:
- A gray or white haze is moisture trapped in the finish. Black or dark brown staining is a tannin reaction in the wood itself, under the finish where no liquid you apply reaches it.
- The seam read:
- Look along the board joints in raking light. Darkening that follows a seam means liquid ran into the joint.
Read the counts with the surface in mind. They are not a wood floor failure rate, because nothing in the corpus records what the finish was doing at the time. They record how often the fight reached the wood itself, and how often the answer turned out to be a sander rather than a bottle.
What to Use on Cat Urine on a Sealed Wood Floor
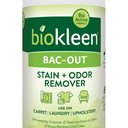
A hard-floor formula, applied on a cloth, in a size you can control. The jug logic from the carpet pages does not apply, because volume is the hazard. Each product page prints its enzyme evidence level. You also need microfiber cloths, a soft brush for the seams, painter's tape and a longwave ultraviolet light. Skip the plastic sheet entirely: on carpet it changes the outcome and on wood it causes the damage. Neither market leader names an enzyme anywhere we read. On a wood floor the enzyme content matters less than the fact that you can apply a controlled amount of it.
The ultraviolet light earns its place on a sealed floor the same way it does on carpet. Urine that ran along a seam leaves its trace on the board faces at the joint, and the light maps which joints are worth brushing. Tape marks the working area so every pass stays inside it.
The cloth is the applicator because it caps the dose. A wrung cloth carries a small known amount of liquid and gives it up under the hand, board by board. A spray puts product where you did not aim, and a pour puts it in the seams, and both fail on wood for the same reason: liquid nobody is controlling.
The small bottle is the honest package for this job. A wood floor treatment is measured in cloths rather than pours, and a gallon waiting in the corner is a standing temptation to skip the wringing step that makes the method safe.
How to Clean Cat Urine off Hardwood, Step by Step
For a floor whose finish is intact. If the water beads soaked in, stop here, because an unsealed board drinks whatever you apply. The repetition count below is our reasoning rather than a manufacturer's instruction, because no source we found publishes a contact time for finished wood.
The passes are the treatment and the drying is the protection, so the two alternate rather than run together. Every step that puts liquid down has a matching step that takes it back up, and the fan between passes keeps that ledger honest.
Small working squares are what make repetition safe. An area one cloth can dry in under a minute never holds standing liquid, and a whole room wet at once always does. Keep the wetting and the drying in the same pair of hands.
Treat the repetition count as a dial rather than a prescription. Start at the low end, run the smell tests, and add passes while the floor shows no response. Stop the moment any board shows lift, because passes are recoverable and cupping is not.
Work with the grain and against instinct. The instinct on a visible stain is to scrub the face of the boards, and the face is the one part of the floor the finish already protects. Time spent on the seams is what the smell responds to, and the brush is the tool that spends it there.
Keep the room at normal living temperature through the whole sequence and keep the fan moving air rather than heated air. The passes depend on the product staying active, the drying depends on air exchange, and both fail quietly in a cold closed room.
-
Map the spot with a longwave ultraviolet light in a dark room and tape the outer edge.
1 dark room
-
Run the finish test: 3 drops of water on a clean board and 3 on the mark, read at 10 minutes.
10 minutes
-
Vacuum and dry-wipe the whole area first, then work one 12 inch square at a time so nothing has a chance to pool.
12 inches
-
Dampen a microfiber cloth and wring it until no water comes out under a 5 second squeeze.
5 seconds
-
Work each board seam with a soft brush, roughly 20 strokes per seam, then wipe the seam dry immediately.
20 strokes
-
Dry every treated square within 60 seconds with a clean cloth.
60 seconds
-
Wait 30 minutes and repeat the whole damp-and-dry pass.
3 to 5 passes
-
Run a fan across the floor between passes and leave it running for 2 hours after the last one.
2 hours
The Step People Skip on a Wood Floor
The seams. People clean the face of the boards, which is the part they can see, and leave the joints alone.
A board joint is the only opening in an otherwise sealed surface. The finish that protects the face of the board does not protect the cut edge inside the joint, which is where the smell survives a floor that looks clean.
The second thing people skip is the wait between passes. Wiping five times in five minutes is one long wet application. Wiping five times across a day, drying between, is five short ones.
Seam work is slow by design. The brush moves product along the joint and into the gap where the finish is absent, and the immediate dry wipe keeps the joint from holding liquid of its own. A handful of seams done properly beats a whole floor done fast, because the floor face was never the problem.
The wait exists for the wood rather than for the product. A dry board gives up nothing to the next pass and takes on nothing from it, and that is the state you want before each contact. Wet wood swells a little with every additional pass, and the swelling adds up across a day even when each pass is small.
The seam is also where the product earns its keep chemically. A deposit inside a joint sits against unfinished wood where a brushing pass can reach it. The same deposit under the middle of a board sits beneath the finish and is unreachable, which is why the effort follows the joints and not the eye.
How to Tell the Urine Smell Is Out of the Wood
- The warm damp test:
- Wait 48 hours after the last pass. Lay a towel wrung out in warm water over the spot for 20 minutes, then smell at floor level.
- The seam sniff:
- Smell along the joints rather than over the middle of the board.
- The straightedge check:
- At 72 hours, lay a straightedge across 3 boards and look for rocking or a raised edge. That is a damage read rather than an odor read.
- The humid week:
- The real verdict arrives on the first warm wet stretch.
A floor whose seams took urine will usually not go completely quiet. The useful question is whether it is quiet enough to live with, or whether you are refinishing.
Set the expectation before the first verdict arrives. A floor whose finish held can go fully quiet, and a floor whose seams drank comes down to a level rather than a zero. Deciding what level you can live with is cheaper than deciding it after three more bottles.
The reads run as a funnel. The towel test stresses the whole spot the way a humid week will, the seam sniff localizes whatever answers, the straightedge catches damage you caused rather than smell you missed, and the humid week itself is the appeal nobody can rush.
Log what each read finds rather than trusting memory across days. A seam that answers the towel test today and still answers next week is a seam heading for the refinish decision, and the pattern is only visible written down.
Why the Cat Urine Smell Is Still in the Hardwood
Six causes, and on wood the order is different from carpet, because the surface stops you from over-applying rather than tempting you to under-apply.
Keep the straightedge next to the tree. Cupping after a treatment is the one symptom that means the treatment made the floor worse rather than the floor resisting it, and it means stop, fan, and wait before anything else happens.
Two branches end the cleaning conversation on their own. Drops that soak in and black staining both describe a deposit below the reach of anything you can safely apply, and the honest fix changes from chemistry to carpentry. The other branches are still yours: seam work, drying, and patience.
The tree reads differently on wood because the failure direction is reversed. Carpet tempts you to under apply, and the fix is usually more liquid. Wood punishes over applying, so the first question under any symptom is whether liquid is even the right tool at that spot.
Depth has a second face on wood that carpet never shows. A deposit that soaked through a seam can reach the joint structure below the boards, and the smell arrives through the joints from under the walking surface. No amount of face cleaning touches it, and the straightedge and the seam sniff together are what say so.
-
The floor looks clean and the smell is still there at floor level.
Why: The deposit is in the board seams, where the finish does not protect the cut edge of the wood.
What to do: Work each seam with a soft brush for about 20 strokes, wipe it dry immediately, and repeat 3 to 5 times across a day.
-
The water test shows the drops soaking in and darkening the wood.
Why: The finish is gone at that spot and the board is drinking whatever you apply. The urine went the same way.
What to do: Stop cleaning. Sand and refinish that area, or replace the boards. Anything you pour now goes into the wood and under it.
-
There is a black or dark brown stain that will not lift.
Why: A tannin reaction in the wood below the finish, which is out of reach of any liquid applied to the surface.
What to do: This is a sanding decision. Get quotes for a spot repair and for refinishing the room, and compare them against replacement.
-
The boards have cupped, rocked or lifted at the edges since you cleaned.
Why: Moisture was held against the wood, usually by pouring, by a covered soak or by a steam mop.
What to do: Stop applying liquid, run a fan for several days, and let it acclimate before anyone touches it with a sander.
What Not to Put on a Hardwood Floor
- A pour, or a covered soak:
- The carpet instruction transplanted to wood is how a floor cups.
- A steam mop:
- Heat plus water forced into a finish is the fastest way to lift it, and Rocco and Roxie says high heat also deactivates its biological ingredients.
The steam mop deserves emphasis because it arrives looking like help. It is marketed for exactly these floors, and the heat plus forced water is the quickest single way to open the seams to the next accident.
- Peroxide or an oxygen powder:
- Both bleach wood as well as the stain, and the patent literature is blunt that hydrogen peroxide would kill the probiotics.
- Bleach:
- Hypochlorite meeting the ammonia in urine produces chloramine gas, and it strips the color out of the boards.
- Ammonia:
- Ohio State's Indoor Pet Initiative tells owners never to use it.
- Vinegar, on a wood finish:
- Acid dulls polyurethane over time and sits below the pH floor where subtilisin proteases are inactivated.
The list is short on wood because the safe set is short. A controlled amount of a hard floor formula on a cloth, the water from the bead test, and a fan are the whole toolkit. Everything else on the shelf risks the boards, the finish, the next treatment, or the person holding it.
The order of risk matters when something has already gone on. A steam mop leaves heat and water in the seams, which is damage but leaves the chemistry open. Peroxide leaves residue that kills a future bacterial treatment, which is a blocked retry. Bleach leaves a stripped board and a hazard in the room. Reading the aftermath this way tells you which cleanup comes first.
When Cat Urine on Hardwood Stops Being a Cleaning Problem
Hardwood reaches the end of the cleaning road faster than carpet, because the floor's own defense is what fails. Each marker below is a point where the deposit has left the zone a cloth can reach, and the honest response changes category.
- When the boards are black:
- Dark staining is a tannin reaction below the finish. Sanding reaches it. Nothing in a bottle does.
Read the markers as a sequence rather than a menu. Black boards and a failed water test can arrive together after one old accident, and each one independently ends the bottle phase. The veterinary line is different: it describes the cause rather than the floor, and it comes first whenever the urination is new.
- When the water test fails:
- Absorption means the finish is gone at that spot, and an unsealed board drinks whatever you put on it.
- When a seam took it:
- Liquid between or under boards is a lifting job, not a wiping job.
- When the subfloor is involved:
- Lift a board and look. Treating and sealing the subfloor is carpentry.
- When the cat is the reason:
- New urination outside the box is a veterinary question first.
Cleanfax states the rule: the cost of odor control should not exceed the cost of replacing the material.
The rule lands harder on wood than on carpet, because a floor prices higher than a room of carpet. Run the numbers early, while the cleaning attempt is still cheap, so the decision is made against quotes rather than against a smell that has lived in the house for months.
- What we believe
- On a wood floor the deposit is either above the finish or below it, and only the first case is a cleaning problem.
- What would change our mind
- A manufacturer or trade document publishing a contact time for a finished wood floor, with a damage limit attached.
- What we could not verify
- Any published dwell time for wood.
What Cat Urine on Hardwood Costs to Fix
The cleaning attempt is cheap and the honest range of outcomes is wide. One small bottle covers several passes over a room, which is the entire cost of finding out whether the finish held. The next tier is sanding and refinishing the affected boards, then refinishing the room, then lifting the boards and sealing the subfloor. Get three local quotes for each, because the spread on that work is large and local.
The wide range is not vagueness, it is the real shape of the problem. The first tier is a bottle and an afternoon, and every tier after it is trades and dust. The water test decides which world you are in before you spend anything past the first bottle.
Quote the tiers at once rather than climbing them. A refinisher measuring the room can say whether board replacement belongs in scope, and a sander can say whether the dark marks will lift. One visit carrying all the questions beats three visits bought in sequence by a smell.
The first tier carries the whole diagnosis. One small bottle, one cloth, one brush and one afternoon tell you whether the finish held, and that answer is worth more than any quote. Spend it before anything else, because every later tier assumes the first one failed.
Keep the tiers separate when the quotes arrive. A cleaning bill, a refinishing bill and a board replacement bill answer different questions, and mixing them is how a floor becomes a renovation. Name the tier in writing when you ask, and hold the quote to it.
$13.49 to $14.99 Typical spend on this job
Prices read from our own catalog on August 19, 2026.
What We Could Not Verify on This Page
The largest gap is the important one. No manufacturer, supplier or trade source we read publishes a contact time for a finished wood floor, so the pass count here is our reasoning and is labeled as such. No carpet figure was reused here either, because a carpet dwell and a carpet corpus count are not wood findings.
Treat the pass count accordingly. It is a starting point with a stated basis, not an instruction from a manufacturer, and the smell tests rather than the count decide when the floor is finished.
The gap cuts in the reader's favor once it is named. A contact time nobody published cannot be quoted at you from a bottle label, and a floor that needs more passes rather than fewer is a floor, not a failure. The pass count was reasoned for a surface that has to survive the treatment, and the smell tests police the result either way.
What carries the page is the part that is sourced. The finish test, the seam mechanism, the cupping chain and the subfloor warning trace to documents, and the corpus counts are stated with their denominators. The reasoning sits on top of that and is marked where it starts.
| Claim | Source | Tier |
|---|---|---|
| Bridgepoint's own urine directions, written for carpet, carry the caution that some subfloors may be susceptible to water damage | spec-sheets.interlinksupply.com | Direct or original source |
| Bio-Charge specifies a four to 24 hour dwell and names carpet, textiles and colorfast hard surfaces; it does not name a finished wood floor | spec-sheets.interlinksupply.com | Direct or original source |
| Nature's Miracle safety data sheet gives product pH 6.25 to 7.5, withholds the composition as a trade secret, and names no surface dwell time | assets.unilogcorp.com | Direct or original source |
| Rocco and Roxie warns that high heat deactivates its own biological ingredients | roccoandroxie.com | Direct or original source |
| Hydrogen peroxide is a natural antimicrobial and would kill the probiotics in a live bacterial formulation | patents.google.com | Direct or original source |
| Subtilisin proteases are inactivated below pH 4 | heraproject.com | Direct or original source |
| Never use ammonia or ammonia-based products, because the smell can attract the cat back to that area | indoorpet.osu.edu | Secondary source |
| Hypochlorite meeting the ammonia in urine produces chloramine gas; US poison centers logged 75,186 chlorine and chloramine exposures between 2015 and 2022 | pmc.ncbi.nlm.nih.gov | Direct or original source |
| The cat-specific odorant is a sulfur compound formed from felinine over roughly 12 to 24 hours, which dogs do not produce | cell.com | Direct or original source |
| The cost of odor control should not exceed the cost of replacing the material | cleanfax.com | Secondary source |
| The People Also Ask questions used here are the live entries on the tracked SERP for enzyme cleaner for hardwood floors. No SERP row exists for the exact long-tail target query | enzymecleaningproducts.com | Direct or original source |
Frequently Asked
Can I use enzyme cleaner on hardwood floors?
Yes, on a floor whose finish is intact, applied on a damp cloth rather than poured. The chemistry is fine and the volume is the risk. The wood itself is the constraint. Liquid standing on a seam migrates under the finish, where no cleaning chemistry reaches and the answer becomes refinishing. Short, repeated applications with drying between them buy contact time without the water damage a soak would do.
What is the best enzyme cleaner for dog urine on hardwood floors?
A hard-floor formula in a size you can control, not a jug. Control matters more on wood than on any other surface, because too much product is as real a failure as too little. A pour bottle in careful hands still beats a mist, since a mist barely wets the surface. Damp, wait, dry, repeat is the working rhythm on this floor.
What is the best thing to use to clean hardwood floors?
For routine cleaning, a damp microfiber mop and a cleaner made for your finish. An enzyme product is not a floor cleaner and belongs only on the specific spot an animal used. Keep both off any floor whose water test shows the finish is gone. Urine on wood follows the seams. Once it is between the boards or under the finish, the bottle has run out of reach and the repair runs to sanding and sealing. Catching it while it sits on top of an intact finish is the whole game.
More on the same problem in Surfaces and Materials.