Removing a Previous Owner's Pet Smell
Find every spot before you treat any of them. A longwave UV flashlight, after dark, at floor level, including baseboards and floor registers, and tape every candidate. The map decides whether this is a forty-dollar job or a four-thousand-dollar one, because the seller already cleaned what could be seen and what you can still smell is what cleaning did not reach. Treating the spots you happen to find is how a house gets treated three times.
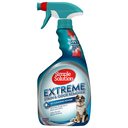
You cannot treat what you have not found, and the previous owner already treated everything you can see. Start with the search, not the bottle.
What to Do First in a House That Smells of the Previous Owner's Pets
Find every spot before you treat any of them. Buy a longwave UV flashlight, wait for dark, and sweep every room at floor level, including baseboards and floor registers. Tape every candidate. The map decides whether this is a $40 job or a $4,000 one.
The seller already cleaned. What you can still smell survived that, so it is somewhere the cleaning did not reach.
The map comes first because everything downstream is priced by it. Treatment product, hours of labor and the replace-or-treat decision all key off where the contamination sits. None of them can be sized from a smell while walking through a room.
A smell you can notice on day one has survived real opposition. Seller cleaning, carpet cleaning before listing and months of ordinary ventilation all ran before you arrived, and the deposit outlasted them. Whatever remains is settled into the layers a mop and a spray live on top of.
Floor level is where the evidence sits. Urine deposits live at the bottom of the room, and a nose at standing height averages the whole volume of air. Every search in this job happens within inches of the floor, at the surfaces a pet can reach.
Tape turns an evening of searching into a plan. Marked spots persist after the lights come on, and the pattern they form shows concentration, travel paths and the rooms that need the deeper conversation about pad and subfloor.
The size of the taped map is the first cost estimate you will get in this house, and it is free. A single marked corner is an afternoon. A taped outline across every room is a different project, and knowing that on day one is worth the flashlight.
| First move | Map it before buying anything. |
|---|---|
| UV light | Longwave, 365 to 395 nm. |
| Where it usually is | Carpet pad and tack strip, subfloor seams, the bottom 6 inches of baseboard, floor registers |
| Treatment volume | Enough to wet the carpet 6 inches past the fluorescing edge and reach the pad |
| Dwell | 4 to 24 hours kept wet, per Bridgepoint. |
| Order of operations | Find, remove the source, clean, dry, then seal. |
| Sealer, on bare boards | Alcohol-borne shellac primer. |
| Carpet pad replacement | $0.75 to $1.75 per square foot installed, or $110 to $250 for a 12 by 12 room |
Finding Old Pet Urine With a UV Light
Work at night with the lights off, hold the beam at a shallow angle to the floor, and go slowly. Tape everything that lights up, then confirm each mark by smelling at floor level.
Wide, even blue-white fluorescence is optical brightener from an earlier cleaning attempt, not urine. It tells you somebody already worked that room.
Sweep four places people forget: the bottom 6 inches of baseboard and drywall, the floor registers, the threshold strips, and any closet an animal was shut into.
The shallow angle matters because fluorescence needs a returning signal. A beam pointed straight down scatters into the pile, while a beam raked across the floor bounces off whatever sits in the fiber and returns to your eye. Slow passes at a low angle find what quick sweeps miss.
Confirmation by smell is not optional. Several things fluoresce that are not urine, and several urine deposits hide under residue from cleaning. The light finds candidates; the nose at floor level confirms them; the tape records the ones that survive both tests.
The brightener pattern is information rather than noise. An evenly glowing room tells you the previous owner cleaned with a detergent that leaves optical brightener, which means the rooms were worked and the smell survived the working. Concentrate suspicion where patches of glow sit instead of covering.
The forgotten places are forgotten because nobody cleans them. Baseboard edges, register boots and closet floors sit outside every ordinary cleaning routine, which is exactly why a smell can live in them for years. A marking animal seeks edges and quiet corners, and the search should follow the same logic.
Where the Smell Is When the Carpet Is Already Gone
If the seller replaced the carpet and it still smells, the deposit is under or behind something. Five places hold it.
- The pad:
- Urine passes through carpet backing in seconds and spreads sideways, so new carpet over an old pad carries the problem forward.
- The tack strip:
- Bare wood at the wall line, in permanent contact with whatever ran to the edge, and almost never replaced.
- Subfloor seams:
- Plywood and oriented strand board wick along the seams, so a board reads clean in the middle and foul at the joint.
- The bottom of the wall:
- Baseboard, shoe molding and the lowest few inches of drywall hold marking behind paint.
- Floor registers and flexible duct:
- The reservoir nobody checks, and the one place cleaning is not the answer.
All five hold the same deposit: urea, the bacteria that turn it into ammonia, and salt residue that rewets at roughly 55 to 75 percent relative humidity.
Each of the five places holds the deposit for a different reason, and the reason predicts the fix. The pad holds it by absorption, the tack strip by contact, the seams by wicking, the wall by splashing and marking, and the duct by airflow carrying it there.
New carpet changes none of them. It covers the pad, sits on the tack strip and lies over the seams while leaving the wall and the registers exactly where they were. A smell surviving a re-carpet is the expected outcome of a job that addressed the layer you see.
The common chemistry is why one product category addresses all five. Every location holds the same organic deposit, and the same bacteria and enzymes work on it wherever it sits. What changes between locations is access, and access, not chemistry, is what breaks the treatment.
What You Need to Clear a House You Just Moved Into
This job is bought by the gallon, not the trigger bottle. **A longwave UV flashlight:** 365 to 395 nm, with painter's tape to mark the candidates. **Plastic sheeting:** To cover treated areas so they cannot dry before the chemistry finishes. **A wet vacuum or rented extractor:** For pulling loaded solution back out rather than letting it dry in place. **Box fans:** One per treated room, so the house dries out after treatment instead of holding the damp. **A pry bar:** For lifting carpet at a corner to see the pad. Buy a pour format.
The gallon format matches the geometry of this job. Rooms rather than spots, old deposits rather than fresh ones, and repeated courses rather than single applications all push the volume past what any spray package carries or applies correctly.
The extractor earns its place at the end of the treatment rather than the beginning. Pulling loaded liquid out after the dwell prevents the dissolved deposit from drying back into the fiber, which is the difference between removing it and relocating it.
The fans belong to the drying phase, and the drying phase belongs to the house. A whole treatment regime that leaves the rooms damp trades a smell problem for a moisture problem, and airflow closes that loop.
The pry bar answers the question the map raises. A taped outline tells you where to look, and one lifted corner tells you what the pad actually is: clean enough to treat through, or loaded enough to replace. That single look prices the rest of the job.
How to Treat a Whole Room Instead of a Single Spot
Do one room at a time and finish it. A house-wide treatment started everywhere at once dries everywhere at once.
One room at a time protects the dwell. A treatment spread across a whole house dries at the speed of the driest room, and nobody can weight plastic over an entire floor at once. Finishing a room means the wet hours actually happened there before the next one started.
The inspection cut comes before any chemistry because it decides the chemistry's fate. A pad that is loaded at the corner of the marked area answers the treat-or-replace question for the whole room, and answering it after three gallons is the expensive order.
Pouring to the towel test keeps a room-sized treatment honest. It is easy to spread a fixed volume thinly across a wide area and call it done. The towel catches that immediately: damp means the pour is behind, wherever the marked edge is.
The weighted plastic is what holds a room overnight. Edges vent, vents dry, and a dry room at hour six is a treatment that ran a fraction of its window. Weight on all four sides is the cheapest insurance in the whole method.
Extraction and airflow close the treatment. What the chemistry dissolved is now sitting in liquid in the assembly, and removing that liquid is the removal step. Drying without extracting leaves the deposit in place, just thinner and more evenly spread.
The registers get their own pass because they were never part of the carpet's drainage path. Air carried deposit into the boot and the first foot of duct, and no amount of floor treatment reaches metal that sits beside the treated area rather than under it.
-
Lift the carpet at one taped area and look at the pad.
6 inch inspection cut
-
Decide per room.
1 third of the floor
-
Pour rather than spray, out to 6 inches past the fluorescing edge, until a folded white towel pressed hard into the center comes up wet.
6 inches past the edge
-
Cover each treated area with plastic overhanging by 3 inches and weight the edges, so the solution cannot dry.
3 inches of overhang
-
Hold it 12 to 24 hours, the long end of Bridgepoint's range, because a previous owner's deposit is old by definition.
12 to 24 hours
-
Extract with a wet vacuum on suction, no heat, then run a box fan for 8 to 12 hours.
8 to 12 hours of airflow
-
Pull the floor registers, wipe the boot and the first accessible foot of duct, and change the furnace filter.
1 foot of accessible duct
-
Judge the room at 48 hours, closed up and warm, at floor level and again at each register.
48 hours
Why Sealing the Subfloor Before You Treat It Locks the Smell In
Sealing a deposit you have not removed traps the source under a film and prevents later cleaning from reaching it.
The order is remove, clean, dry, then seal. Take out the carpet, pad and tack strip, treat the boards so the solution stands in the seams, then extract and dry hard with airflow.
An alcohol-borne shellac primer is the trade choice, because it does not re-wet the salts underneath. Zinsser B-I-N covers about 500 square feet per gallon and names urine among the stains it blocks. Its own data sheet says it is not recommended for floors, and the coverage figure does not hold on bare oriented strand board.
The order is the whole trick. Sealing is the last step of a removal. As a first step it is a preservation: the film isolates the deposit from everything you might later apply, while the deposit keeps doing what it does underneath.
A film is a barrier in one direction only. It stops later liquids from reaching the deposit. It does nothing about what the deposit emits through it as vapor, which is the failure people hear as a smell that survived the renovation.
Remove, clean, dry, seal exists because each stage feeds the next. Removal exposes, cleaning reduces, drying stabilizes, and only a stable surface is worth coating. Sealing damp boards traps moisture against wood that is already carrying a load.
The trade's primer choice follows the same logic. A shellac carried in alcohol does not re-wet the salts the treatment left, so the seal does not restart the chemistry you just finished. A waterborne coating can, and the smell that returns after one has a mechanism, not a mystery.
How to Tell Whether the House Smell Is Actually Gone
Give it 48 hours after everything is dry. Close the house up, bring it to normal living temperature, leave it four hours, then come in from outside. Your nose stops reporting a smell you have been sitting in.
Check at floor level in each treated room, then at each register with the furnace fan running. A cool, ventilated house gives a false pass. To get the August answer in April, run a humidifier in a closed room for 2 hours.
If the room reads clean at floor level and the smell arrives when the system cycles, the deposit is in the duct.
Coming in from outside resets the instrument. A nose that has been inside adapting to the house reads declining levels as zero, and the wait restores its calibration before the reading that counts.
Floor level and register checks interrogate two separate systems. The floor reads the deposits that were treated, and the registers read the duct path that floor treatment never touched. A house can pass one and fail the other, and the failure has a location.
The warm closed room is the honest test condition. Cool moving air suppresses exactly the exchange that makes the smell. A pass earned in a cold ventilated house is a pass earned under conditions that will not exist in August.
A humid room forces the seasonal answer early. The salts restart at the humidity an occupied house produces on its own in summer. Creating that condition now tells you what the first warm month would have told you later, while there is still time to act on it.
Why the House Still Smells After You Replaced the Carpet
Five branches. The first four are recoverable with more liquid and more patience. The fifth is where the money is.
Replacement changes the layers, not the causes. New carpet over a loaded pad or an unsealed subfloor reproduces the original problem with better-looking fiber on top. The branches separate the versions more work can fix from the one it cannot.
The recoverable branches share one shape: the treatment was smaller than the deposit. More liquid, wider coverage and a full dwell address them, and the fix costs product and patience rather than construction.
The expensive branch is a location, not a method. When the deposit has moved into material cleaning cannot reach. Was sealed in by a previous owner's renovation, the answer is removal and refinishing rather than another course of soaking.
Run the cheap branches first even when you suspect the expensive one. Closing them costs a fraction of the construction work and removes the doubt that would otherwise survive the renovation: whether the smell was ever the carpet at all.
Match the symptom you can observe, which in a bought house is mostly timing and location. Worse in the afternoon warmth points one way, worse when the system cycles another, and a smell that survived the seller's renovation a third. The branches read that pattern.
Each branch also names its own judge. Some read at 48 hours in a warm room, some read at the register, and the expensive one reads when the boards come up. The interval belongs to the branch, not to the calendar.
-
You treated every marked spot and the rooms still smell in the afternoon.
Why: The treatment reached the carpet and not the pad. Urine spreads sideways under the backing.
What to do: Lift a corner and look.
-
The seller replaced the carpet before listing and it still smells.
Why: New carpet went over the old pad and tack strip, which carries the deposit forward under a clean surface.
What to do: Pull the carpet back at the wall.
-
It smells worst when the heating or air conditioning cycles.
Why: The deposit may be in the registers or the flexible duct, which must be inspected directly.
What to do: Pull the registers, clean the boots, change the filter, and get a quote to replace contaminated flex.
-
Somebody primed over the stained subfloor and the smell came back.
Why: The source was sealed in rather than removed, and the animals can still smell it.
What to do: Strip the coating, treat the boards so the solution stands in the seams, dry hard, then reseal with an alcohol-borne shellac primer.
What Not to Do in a House You Just Bought
- Do not paint or seal first:
- It converts a cleaning problem into a demolition problem.
- Do not use ammonia-based cleaners:
- Ohio State's Indoor Pet Initiative is direct: the smell may attract an animal back to that spot.
- Do not lead with a rental machine:
- Rental and store machines appear 158 times in the corpus, often as the thing that spread a deposit sideways.
The errors on that list share one motive: making the house look finished before it is clean. Painting, sealing and fresh carpet all convert a treatable deposit into a trapped one, and none of them remove a gram of it.
Sequencing is where the money is. Top down, structure before textile, ductwork before the rooms it serves: each order exists because later stages soil earlier ones. Reversing it means paying twice for the same square footage.
Oxidizers fail differently in an empty house. With nobody living in the rooms to notice, a peroxide treatment dries into the fiber and sits there. The bacterial course that follows lands on an antimicrobial residue it cannot survive.
Rental machines fail by delivery. They extract well and inject poorly. A urine deposit pushed sideways by wand strokes becomes wider and thinner, which is harder to map and harder to treat than what was there before.
The empty house makes every mistake cheaper to make and dearer to fix. Nobody is living in the rooms to smell an oxidizer drying into the fiber or to notice what the previous owner already poured, and the first week of occupancy is when the trapped deposits announce themselves. Treat before the moving truck arrives rather than after, and the sequence stays a cleaning job instead of becoming a renovation one room at a time.
Whether to Treat the Room or Replace What Is Under It
Run the comparison per room, before the third gallon. If more than about a third of a room's floor fluoresces, treating it properly costs about what new pad costs.
- Do it yourself:
- $37.49 per gallon jug, and a whole-house carpet job is 2 to 4 gallons. Add $30 to $80 for a wet vacuum.
- A professional:
- $100 to $700 per room, with subfloor extraction listed separately at $50 to $200, per Angi.
- Replace what holds it:
- Carpet pad at $0.75 to $1.75 per square foot installed, per HomeGuide.
- Replace the duct:
- No published figure we could fetch, so we publish none.
Cleanfax gives the trade rule: the cost of odor control should not exceed the cost of replacing the textile.
Run the comparison per room because contamination clusters. One loaded corner and one clean bedroom are different decisions, and a house-wide average hides both of them behind a number that describes neither.
The threshold exists because treatment cost scales with area while replacement cost scales with material. Up to a fraction of the room, soaking remains the cheaper route. Past it, the pad price wins, and the crossover arrives before most people expect it.
Treat the comparison as the spend plan rather than a verdict on the house. Some rooms will take chemistry and a weekend, one may take a pad and an installer, and the map tells you which is which before the money moves.
The trade rule prices the ceiling. Odor control that costs more than replacing the textile is the wrong instrument, and the same arithmetic that governs a cleaning company's bid governs your Saturday.
$79.90 to $700 Typical spend on this job
Low end is 2 gallons of product for one floor, and the one pet product we hold in a 128 ounce size ran $37.49 at our catalog's August 19, 2026 prices. High end is professional pet odor removal at $100 to $700 per room, with subfloor extraction listed separately at $50 to $200, per Angi.
What We Could Not Verify About Pet Smell in a Bought House
Rust-Oleum's page renders through scripting and its data sheet link redirected, so we did not fetch the B-I-N PDF on August 19, 2026. The coverage figure should be re-checked before anyone relies on it.
We found no published price for replacing contaminated flexible duct, so we publish none.
The two gaps on this record are both about money rather than method, and money gaps have a different shape than chemistry gaps. The method stands on published sources; the missing figures are market prices, and market prices change in ways a method does not.
A missing price is an instruction to get local quotes rather than a reason to skip the decision. Duct replacement and subfloor work are priced by trades who visit the house, and two calls produce a real number where a search produced none.
Dates travel with the numbers that carry them. A coverage figure read on one day is a figure as of that day. A data sheet that cannot be fetched is a citation that cannot be checked, which is why it is flagged rather than repeated with confidence.
None of the gaps touch the decision sequence. Map, inspect, treat or replace, verify warm: every step runs the same with the gaps open. Closing them would change what a reader pays rather than what a reader does.
| Claim | Source | Tier |
|---|---|---|
| Bio-Charge specifies a 4 to 24 hour dwell on carpet and covering the treated area so the solution cannot dry | spec-sheets.interlinksupply.com | Direct or original source |
| The contaminated area under a carpet may be more than twice the size of the surface stain, and the instruction is to reach the pad and subfloor | spec-sheets.interlinksupply.com | Direct or original source |
| Rocco and Roxie specifies overnight for older spots and a couple of days for deep set-in urine | roccoandroxie.com | Direct or original source |
| ODORx Un-Duz-It Unleashed combines oxidizers, enzymes and encapsulants, is pH 9.0 ready to use, and specifies a one hour dwell then extraction | specs.safetyexpress.com | Direct or original source |
| Zinsser B-I-N names urine among the stains it blocks, covers about 500 square feet per gallon, and its data sheet says it is not recommended for floors. We could not later source review the PDF on August 19, 2026 | rustoleum.com | Direct or original source |
| Never use ammonia or ammonia-based products on carpet, because the smell may attract the animal back to that area | indoorpet.osu.edu | Secondary source |
| The cost of odor control should not exceed the cost of replacement of the textile | cleanfax.com | Secondary source |
| Catalog sizes, prices, ratings and per-product enzyme evidence levels, read August 19, 2026 | /about/ | Direct or original source |
| Pet odor removal $100 to $700 per room; subfloor urine extraction $50 to $200 per room. Angi returns HTTP 403, so this is reviewed from the cited source | angi.com | Secondary source |
| Carpet pad replacement $0.75 to $1.75 per square foot installed. HomeGuide returns HTTP 403, so this is reviewed from the cited source | homeguide.com | Secondary source |
| Dried urine leaves an alkaline salt residue that absorbs moisture from the air, which rewets the deposit and restarts the bacteria. The 55 to 75 percent band is our own reading. The author of the cited piece sells an enzyme product line | cleanfax.com | Secondary source |
- What we believe
- Mapping the contamination is worth more than any product choice, because the map decides whether this is a cleaning job or a construction job.
- What would change our mind
- A documented case of a whole-house pet smell cleared by surface treatment alone, with pad and subfloor left in place, holding through a humid summer.
- What we could not verify
- The cost of replacing contaminated flexible duct, for which we found no published figure.
Frequently Asked
Does enzyme cleaner remove urine smell?
Yes, where the liquid reaches the deposit. It removes the organic material that keeps regenerating the smell rather than masking it. In a house you just bought, the reason it seems not to work is depth. Old houses raise the depth problem in its worst form, because the deposit has had years to migrate. Carpet replacement without treating what is under it moves the smell nowhere. The UV survey and the subfloor check come before any bottle does.
Is vinegar better than enzyme cleaner for urine?
No, for a smell that keeps returning. Vinegar neutralizes the ammonia note within a minute and leaves the deposit in place. Do not layer them: rinse or dry the vinegar before you soak. The layering warning doubles in a house you are moving into. Every surface is new to you and something may already have been applied to it. Rinse what previous owners treated and start your chemistry on a clean ground.
What is the most powerful urine odor eliminator?
The professional products are stronger. ODORx Un-Duz-It Unleashed combines oxidizers, enzymes and encapsulants at pH 9.0, with a one hour dwell and mandatory extraction. The extraction equipment is the real gap, not the bottle. The extraction requirement is what separates buying the pro product from getting the pro result. Without the equipment, the strongest chemistry still sits in the pad when the dwell ends. Rent the capability or hire it, and the bottle finally has somewhere to go.
Is there an enzymatic cleaner that can remove urine smells from bathrooms?
Yes, and the target is the floor around the toilet rather than the bowl. Urine runs into the grout and the gap at the flange. Pour rather than wipe and expect two or three treatments. Grout and flange gaps hold urine the way pad does, invisibly and durably. A wipe passes over the surface and the deposit stays in the pore. Pouring the product into the gap, and repeating, is the bathroom version of the soak.
More on the same problem in Pet Stains.